Mark Making and Transparent Layers in Mixed Media Collage
A collage can feel flat even when it is full of beautiful papers. The missing piece is often surface activity: the scratches, dots, washes, smudges, and veils that make the eye slow down. Mark making brings energy to a collage. Transparent layers bring depth. Together, they can turn a simple arrangement into a piece that feels lived in, mysterious, and personal.
Mixed media collage is generous because almost anything can become a tool. A stiff brush can drag color across paper. A bottle cap can print circles. A sheet of tracing paper can soften a busy area without hiding it. Once these materials start working together, the collage becomes less about placing things perfectly and more about building a conversation between marks, color, texture, and space.

Mark making gives collage its pulse
Mark making is any visible trace left by a tool, hand, or object. It might be a confident black line, a repeated stamped shape, a dry-brushed streak, a pencil scribble, or a soft stain of diluted ink.
In collage, marks do several useful things at once. They can connect separate paper pieces so they feel like one composition. They can create movement across the surface. They can also add contrast when a piece starts to feel too neat or too planned.
A useful way to think about marks is by their personality:
Mark quality | What it adds to a collage | Tools that create it |
Thin and sharp | Detail, tension, direction | Dip pens, pencils, skewers, fine brushes |
Broad and soft | Atmosphere, calm, background unity | Flat brushes, sponges, cloth |
Repeated | Rhythm, pattern, structure | Stamps, stencils, found objects |
Broken and rough | Age, texture, surprise | Dry brushes, cardboard edges, palette knives |
Loose and gestural | Energy, emotion, movement | Large brushes, hands, sticks |
The most interesting surfaces often combine several of these. A page with only tiny marks can feel fussy. A page with only large marks can feel blunt. When small, medium, and large marks share the same surface, the eye has more to explore.
Brushes can do much more than paint clean lines
Brushes are familiar, but they are often underused in collage. Instead of treating a brush as a coloring tool, treat it as a mark-making instrument.
A round brush can make dots, loops, thin lines, and calligraphic strokes. A flat brush can make blocks, stripes, dry streaks, and crisp edges. An old splayed brush can create grass-like textures or scratchy movement. A fan brush can add soft bursts or repeated arcs.
Try these brush methods on scrap paper before adding them to a finished collage:
Dry brushing
Load a brush with a small amount of paint, then wipe most of it off. Drag it lightly over paper, fabric, or gesso. The brush catches raised areas and creates a broken, weathered texture.
Wet washes
Dilute acrylic, ink, or watercolor with water. Brush it over paper to tint it while allowing text, pattern, or earlier marks to show through.
Edge dragging
Use the side of a flat brush to pull a line along the edge of a paper shape. This can help collage pieces settle into the background instead of looking pasted on top.
Splattering
Tap a loaded brush over the surface to create small dots. Use this with care. A few splatters can add life, while too many can distract from the composition.
Veiling
Brush a thin layer of translucent paint or matte medium over an area. This softens contrast and pushes that area backward visually.
One helpful habit is to keep a “dirty brush” nearby. This is a brush with leftover neutral paint, water, or medium on it. A quick swipe from that brush can tone down a bright edge, blur a transition, or add a touch of grit.
Stamps and repeated marks create rhythm
Stamps bring repetition, and repetition brings rhythm. In collage, rhythm helps guide the eye from one area to another. It can also make unrelated materials feel related.
Commercial rubber stamps are useful, but handmade and improvised stamps often feel more natural in mixed media work. A stamp does not need to print perfectly. In fact, partial prints and uneven pressure often create better texture.
Good stamp materials include:
Carved erasers
Foam shapes glued to cardboard
Wine corks
Pencil erasers
Corrugated cardboard
Bubble wrap
Mesh produce bags
Leaves with strong veins
Lace or textured fabric
Bottle caps and jar lids
A simple stamp can become more complex through layering. Print it once in a pale color, then rotate it and print again in a darker color. Stamp over torn paper, then continue the same pattern onto the background. This links separate areas without needing a hard outline.

To avoid a mechanical look, vary at least one thing as you stamp. Change the pressure, spacing, color, angle, or amount of ink. Let some impressions fade. Let others overlap. The goal is not perfect pattern. The goal is movement.
Found objects make marks with character
Found objects are some of the best tools in mixed media collage because they carry irregularity. A plastic fork, a stick, a piece of thread, or the edge of cardboard can make marks that are hard to imitate with a brush.
Look around the studio, kitchen, garden, or recycling bin. Anything with an edge, texture, hole, or surface can become a mark-making tool.
Try using:
A comb to scrape wet paint into parallel lines
A twig dipped in ink for uneven drawing
A credit-card-sized piece of plastic to spread paint thinly
String dragged through wet acrylic or ink
A sponge to dab mottled color
Crumpled paper to press soft texture into paint
A toothbrush to create fine speckling
Fabric scraps to lift or smear pigment
One of the easiest texture methods is subtraction. Paint a thin layer of color, then remove parts of it while it is still wet. Scrape with cardboard. Press cloth into it. Wipe through it with a damp rag. The removed areas become marks too.
This matters because collage is not only built by adding. It becomes richer when some areas are rubbed back, hidden, revealed, and worn down.
Transparent layers create depth without clutter
Transparent layers are one of the most flexible tools in collage. They allow earlier choices to remain visible while changing their mood, contrast, or importance.
Useful transparent and semi-transparent materials include:
Tracing paper
Vellum
Tissue paper
Deli paper
Sewing pattern paper
Tea bags after they are emptied and dried
Thin handmade papers
Acetate or clear plastic sheets
Transparent gel medium
Glazes made from acrylic paint and medium
Sheer fabric such as organza or gauze
Each material behaves differently. Tissue nearly disappears when glued with matte medium. Vellum stays milky and soft. Acetate remains clear and slick. Tea bags add a warm, stained tone. Sheer fabric adds haze and texture at the same time.
Transparent layers can solve common collage problems. If one area feels too loud, cover part of it with tissue or vellum. If two papers clash, glaze over both with a thin shared color. If the background feels empty, add pale marks on translucent paper and place them over the surface.
The key is to think in layers of visibility. Some elements should be crisp and easy to read. Others can be half-hidden. A few can be barely visible, like memory under the surface.

When using wet adhesive, test first. Some inks bleed. Some papers wrinkle. Wrinkles can look beautiful, but they should feel intentional. Use a soft brush, spread medium thinly, and smooth from the center outward. For delicate tissue, place it down gently and let a few folds remain. They often create lovely shadows.
Color layering works best when some colors stay quiet
Color in collage can become chaotic quickly because paper scraps bring their own palettes. Transparent layers help control that energy. A thin wash of color can unify unrelated pieces. A translucent neutral can calm a bright area. A warm glaze can make cool scraps feel more connected.
A good starting point is to choose a limited palette before building. For example:
One dark color, such as Payne’s gray, sepia, or deep green
One warm color, such as ochre, coral, rust, or soft pink
One cool color, such as blue, teal, lavender, or sage
One light neutral, such as cream, pale gray, or white
This does not mean every scrap must match. It means the repeated colors create a shared language.
Transparent color layers can shift the feeling of paper in subtle ways. Yellow over blue creates greenish areas. Pink over gray warms it. Blue over orange dulls the brightness. White glaze over dark marks creates a foggy effect.
Before adding a transparent layer, ask what the piece needs:
More warmth
More quiet space
Stronger contrast
A color bridge between two areas
A way to push something into the background
A final glow or stain
Let some colors remain clean. If every area gets glazed, the whole piece may turn muddy. Preserve a few fresh notes so the layered areas have something to play against.
Texture makes the surface feel alive
Texture gives collage a physical presence. It invites looking from different angles. It also creates shadows, which can make even a small piece feel dimensional.
Texture can come from the materials themselves, from marks placed on top, or from the way layers are glued. Torn edges, raised paper seams, wrinkled tissue, thread, fabric, sanded paint, and scratched gesso all create surface interest.
A few reliable texture techniques include:
Torn edges
Tear paper toward yourself for a white feathered edge. Tear away from yourself for a cleaner edge. Use both for contrast.
Wrinkled tissue
Crumple tissue, open it, then glue it down. Brush a transparent glaze over the peaks to make the wrinkles stand out.
Incised lines
Apply gesso or heavy paint, then scratch into it with a skewer, comb, or old card before it dries.
Layered seams
Overlap paper edges instead of trimming everything flush. Seams can become quiet lines that support the composition.
Sanding
Once layers are dry, lightly sand raised areas. This reveals earlier colors and makes the surface feel aged.
Texture should serve the whole piece. If every area is rough, no area feels special. Place texture where you want attention, then let smoother areas give the eye a place to rest.
Composition is the art of choosing what matters
Mark making and transparent layers can become addictive. The challenge is knowing when and where to use them. Strong composition gives experimentation a structure.
Start with a simple arrangement of large shapes. Think in terms of big, medium, and small. Large shapes create stability. Medium shapes add variety. Small marks and details bring focus.
A useful collage structure is the “path.” Place elements so the eye moves through the work rather than stopping in one corner. Repeated marks can help build this path. A cluster of dots in one area can echo a smaller cluster across the page. A dark line can lead toward a focal point. A translucent strip can connect two separated shapes.
Contrast also guides attention. Use contrast in several ways:
Type of contrast | How to use it |
Light and dark | Place your strongest darks near the focal area |
Smooth and rough | Set a textured patch beside a calm shape |
Transparent and opaque | Let solid papers anchor airy layers |
Ordered and loose | Pair stamped repetition with hand-drawn marks |
Large and small | Balance big shapes with tiny details |
One practical tip is to pause often and view the collage from a distance of about 2 m. Small surface details matter, but the larger design should still read from across the room.
Taking a photo can also help. The camera flattens the image, making it easier to see if one area is too heavy or if the focal point is unclear.
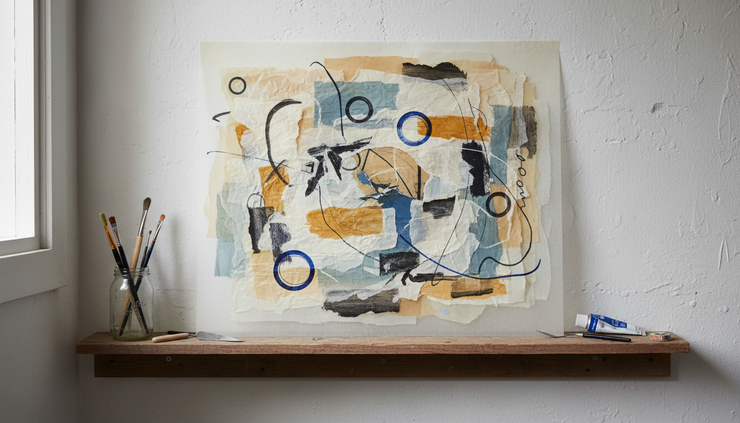
A simple exercise for building a layered collage
This exercise helps bring the techniques together without overplanning. Work on a small surface, around 20 cm x 25 cm, so decisions stay manageable.
Choose three papers
Pick one plain paper, one patterned paper, and one found paper, such as a book page, map scrap, or packaging fragment.
Create a loose background
Glue the papers down in large shapes. Leave some open space. Do not cover the whole surface yet.
Add a quiet color wash
Brush a thin transparent layer over part of the collage. Let some original paper show clearly.
Make repeated marks
Use a stamp or found object to print a simple shape in two or three areas. Vary the pressure.
Add hand marks
Draw lines, dots, scratches, or scribbles with a pencil, brush, dip pen, or twig. Let the marks cross paper edges.
Place a transparent layer
Add tissue, vellum, tea bag paper, or deli paper over one busy area. Glue it carefully and let it soften the surface.
Build a focal point
Add a darker shape, stronger mark, or small high-contrast detail where you want the eye to land.
Edit
Cover, sand, glaze, or scrape at least one area. Editing makes the piece feel more integrated.
Let the collage dry between major wet layers. Patience gives more control, especially when working with thin papers and transparent glazes.
Let the materials answer back
The best mixed media collage work often comes from a balance of intention and response. Start with a plan, but let the surface suggest the next move. If a tissue layer wrinkles, highlight the ridges. If a stamp prints unevenly, repeat the broken effect elsewhere. If a color turns too bright, veil it with a transparent neutral instead of covering it completely.
Mark making and transparent layers in mixed media collage open a wide range of expressive choices. They allow a piece to hold history, correction, accident, and discovery. Begin with simple tools. Make a few marks. Cover some of them. Reveal others. The more you experiment, the more your collage will begin to sound like your own hand.


Comments